Squash Blossom Pizza Recipe from Saveur.com

Squash Blossom Pizza

I found this interesting sounding pizza recipe in an issue of Saveur magazine. Since I absolutely loved cooking with squash blossoms, I therefore absolutely love this pizza! I’ve gone through an condensed the directions as well, making sure to get rid of all instances for silliness. If you’d like to check out the original recipe/directions, check it out at Saveur.com. This recipe, inspired by Pizzeria Mozza, yields a crisp, chewy crust. See Making and Baking the Pie for a sauce recipe and more tips for making pizza.

  • 9 tbsp. extra-virgin olive oil, plus more for drizzling
  • 1 tbsp. active dry yeast
  • 1 tbsp. sugar
  • 1 tsp. kosher salt, plus more to taste
  • 6 cups flour
  • 2 cups pizza sauce
  • 60 squash blossoms, stemmed
  • 1 lb. burrata (a sort-of mozzarella that must be eaten fresh)

1. In a bowl, combine 1 tbsp. oil, yeast, sugar, salt, and 2 cups 115˚ water; let sit until foamy, 10–12 minutes. Stir in flour to make a dough. Transfer dough to a floured surface; knead until smooth, 8–10 minutes. Quarter dough; roll each portion into a ball. Put balls on a floured baking sheet. Cover with plastic wrap; let sit in a warm place until soft and tripled in size, 2–3 hours. IF you’d like to have an even tastier dough, toss the dough in sealable containers, or plastic baggies, and let sit in the fridge for a day or two. When you are ready to bake, pull the dough out two hours before you want to eat to let it come back to room temperature.

2. Place a pizza stone on a rack in lower third of oven. Heat oven to as absolutely as hot as it will go for 1 hour. Stretch dough to a 10″ diameter. Cover dough with a tea towel; let rest for 15 minutes. Brush edges with 2 tbsp. oil. Season dough with salt. Spread 1⁄2 cup pizza sauce over dough, leaving a 1″ border. Arrange 15 squash blossoms over sauce in concentric circles. Transfer pizza to stone; bake until golden brown, 3-6 minutes. Remove pizza and top with spoonfuls of burrata; drizzle with olive oil. Repeat to make 4 pizzas.

MAKES FOUR 10″ PIZZAS
The Elusive Crispy Crust – Tips on Getting a Snap

Reader Aimee writes:

“So how about you tell me why my pizza won’t friggin’ get a crusty bottom!  It tends to be a wee bit on the floppy soggy side.  The top seems to cook the quickest. I tried drying my fresh mozz for a bit and using less sauce, didn’t work. Do you still use pans or do you use a stone now? I use a stone.”

Great questions Aimeee! I think this is probably a big issue for a lot of home chefs for many reasons. Let’s talk about some of them now.

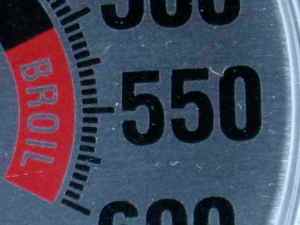
  • Temperature – this is, of course, the obvious first tip to getting crispier results out of your pizza. Many recipes you see – maybe even some recipes on this very blog. Yikes! – will have you preheat the over to 400, 425, 450, something like that. ALWAYS DISREGARD this advice. Commercial pizza ovens operate in the neighborhood of 800 to 1100 degrees, so in order to get even remotely close to the pizza you know and love, you need to crank your oven up to the highest possible setting! For me, this means setting it to 550+. I saw “+” because my oven has a knob which allows me to select “bake” or “broiler” as well as a temperature dial which goes to 550 and then continues on to “broiler.” The double up in terms is a bit confusing, but I think what I’m doing what I set it to “bake” on the mode knob and “broiler” on the temperature knob, I’m asking the oven to try to keep the heating element on as long as it possibly can at the highest temp it possibly can. Goal achieved. Now, because you are running your oven hotter than before, hopefully more liquid will evaporate off your pie and out of your crust which will equal a crispier end product.
  • Preheat – Preheat your oven and let it sit at full temperature for at least 45 minutes to an hour before trying to bake in it. Especially if you are using a pizza stone, this will allow the stone to absorb all the heat it possibly can, as well as the sides of the oven, ensuring that you get the hottest bake out of your oven as possible. I know that my general theme on this blog is that time is the most secret of all ingredients and here it is again – don’t rush pizza, and as Alton Brown says, “your patience will be rewarded.”
  • Baking Stone – This is a big must for a crispy pizza crust. Again, commercial ovens have stone floors in them, not metal, so we can all take a tip from the pros and duplicate this scenario at home. Baking stones are beneficial for two main reasons:

    1) Baking stones absorb and store heat, so while your oven can only generate so much heat, the stone will store much of that heat and radiate it back out to the surrounding oven space. This will not only allow you to achieve temperature higher than what your oven would normally be capable of, but will also regulate heat loss when you open the oven to check on progress. In addition, it will also regulate how wide of a temperture swing occurs as your oven sycles the heating element on and off. Think even heat.

    2) Baking stones absorb water. They have small holes in the surface unlike metal baking pans, so they have the ability to capture and dissipate water. This is a good thing.

    The quick science behind a baking stone (or pizza stone – same thing) is as follows. The stone is both intensely hot and moderately porous. When the dough hits the stone, the water in the dough instantly wants to turn to steam and get the heck out of there, and since there are small air pockets in the stone, the steam has a space to move into. In essence, the stone both causes, and then absorbs, the steam trying to escape from the dough. Again, less moisture, more crispy. Soild petal pizza pans give the water nowhere to go, so the water is either retained in the dough, or must make its way to the surface of the pie before escaping.

  • Dry your ingredients – This may sound funny, but it really really helps out a lot. Especially when you are trying to make a pizza with a lot of fresh veggies! Vegetables and wet cheeses are notorious for releasing a ton of water once they hit the oven, so simply chop everything up before hand, lay it down on a kitchen towel, and fold the towel over so the water from the fresh cut veggies has somewhere to escape to before it hits your crust. I do this with my fresh mozzarella as well and I even take this theory a step further: One I’ve got everything sliced and drying in towels, I place the towels on top of the range where the radiant heat of the pre-heating oven moves up into the veggies and gives them a more thorough drying. Be careful with oven-drying the cheese though. I got a little careless last weekend with some cheese in a towl on the top of a hot oven and when I went to open up the towel, I found that I had glued it together very thoroughly with six dollars of nice fresh mozzarella! Never got that damn towel clean either!
  • Use less stuff – It is always tempting to over top your pizza, but here is a tip: don’t. In general, take whatever your natural instinct is for topping pizza is, and then consciously dial that bake 30%-40%. Pizza is a balancing act between bread, cheese, sauce and toppings, but zen philosophies aside, you’ll find that if you give everything a little breathing room, your cheese will stick to your crust better (no sliding off with the first bite), your pizzas will be crispier, and most importantly, you won’t be as full after eating a slice which means you can eat more! Who can argue against that??

Finally, let’s address one of Aimee’s specific problems she has had trying to combat the floppy soggy crust syndrome.

  • The top seems to cook the quickest – pay attention to how your oven cooks your pizzas and where you are putting your oven racks. If Aimee seems to always have an overcooked top, and an undercooked bottom, she should consider moving her pizza stone down to the next lowest baking rack. Even though we’re talking about the interior of a 550+ degree oven, the laws of thermodynaics still apply: heat rises. A too-quickly-cooked top means that her pizza is too high in her oven and the heat that pools at the top of it is cooking the top of the pizza faster than the bottom. To learn an oven, I would start the stone at the lowest possible rack setting, and then based on how the bottom of the crust turns out, I might move one or two spots up the next time around.

    Interesting technique: many home pizza chefs bake with their pizza stones as low in the oven as possible to get the stone as close to the heating element as possible, then, when they have checked the bottom and it is looking nice and crisp, they move the pie to their oven rack which has been positioned at the very highest spot in the oven to finish off the top. This gives you precise control over how done the bottom and top of the pie are when it finally comes out of the oven. I personally use this technique often, but if I could find that sweet spot in my oven where I didn’t need to do it, I wouldn’t

I hope this has been enlightening and helpful and I hope to see photos of reader Aimee’s improved crispy crusts real soon! Please submit any other questions you guys may have and I’ll answer as best I can. If there is any last tip I could leave you with, I would simply repeat myself in saying that time is the only secret ingredient. So many people are looking for quick eats and dinners in 30 minutes or less, but when compared to dinners that took you 3-4 days to prepare, they all start to taste like fast food!

Spend some time with your food.

Talk soon,

Ryan

Thanksgiving Pizza from… Not Martha!

This was too good to not pass on to you. It’s a Thanksgiving pizza… pie! The Not Marthas, over at wearenotmartha.com created this genius Thanksgiving invention, complete with homemade cranberry sauce, turkey, herbs, and what else, an apple pie in the middle! I personally consider it a step towards the futuristic meal-in-a-pill – just this pill is about 16″ in diameter. What can I say, they’re working on it!

Check out the Thanksgiving Pizza Pie at wearenotmartha.com.

New Pizza Flours from Central Milling

Hello. Have I extolled the virtues of contacting and subsequently ordering fabulous flour from Nick over at Central Milling lately? Well let me tell you, I just received four bags of his latest and greatest “00” flour – two bags reinforced, two bags normal – and can’t wait to get started putting it through the pizza paces. I’ll let you know as soon as I’ve completed a few test pies, until then, how about to email him and order some of your own?

Talk soon,
Ryan

A Great Pizza Read – Recipes from a Pro

Recently I’ve purchased Peter Reinhart’s fabulous pizza book, American Pie, and let me tell you: best – pizza – book – ever! The book details Peter’s travels through Italy, New York, California, Chicago and other locations in search of his most favorite pizza in the whole world. The first half of the book is his tales of pizza travel. The second half of the book, however, is a giant pizza resource center wherein Peter tries to re-create all of the various pizzas he had across the world and shares his recipes and findings with you. This would be cool enough for me to pick up a copy, but then you consider that Peter is a professional baker AND recipe product developer and suddenly his collection of dough, sauce and toppings recipes seem like the Lost Arc of the Pizzanant! I guess what I’m trying to say is that Peter’s book was not only a mouthwatering good read, but also has become my #1 go-to guide for new dough and sauce recipes.

I wanted to share with you a recent recipe I made from his book, as well as some photos of the results. This dough was much different to work with than my dough that I usually make, but I got the hang of it pretty quickly, and the flavors and texture (not to mention the great big bubbles that formed out on the crown of the pizza) were well worth the learning curve. I would highly recommend you go spend $15 and pick up this great resource!

Peter Reinhart’s Neo-Neapolitan Dough

The dough to use for making New-Haven-style pizza and/or pizzas in the style of Lombardi’s, Totonno’s, or Grimaldi’s. Makes a “thin, crisp crust with airy pockets in the crown”. Slightly sticky and may be tricky to work with. Requires high-gluten flour.

Makes 4 10 ounce dough balls ( but I like to make 13.3 ounce balls)

Ingredients

Directions

  1. With a big metal spoon, stir together all the ingredients in a 4-quart bowl or the bowl of an electric stand mixer until combined.
  2. Fit mixer with dough hook; mix on low speed for about 4 minutes, or until all the flour gathers to form a coarse ball.
  3. Let dough rest for 5 minutes, then mix again on med-low speed for 2 more minutes, or until the dough clears the sides of the bowl and sticks just a little to the bottom.
  4. *If the dough is too soft and sticky to hold its shape, mix in more flour by the tablespoonful; if it is too stiff or dry, mix in more water by the tablespoonful.
  5. The dough should pass the windowpane test—snip off a piece of dough and gently tugging and turning it, stretching it out until it forms a paper-thin, translucent membrane somewhere near the center; if dough does not form this membrane, it probably needs another minute or two of mixing).
  6. Immediately divided the dough into 4-equal portions; round each piece into a ball and brush or rub each ball with olive oil.
  7. Place each ball inside its own zip-lock freezer bag; let the balls sit at room temperature for 15 minutes, then put them in the refrigerator overnight or freeze any pieces you will not be using the next day.
  8. The next day, remove the balls from the refrigerator 2 hours before you plan to roll them out to take the chill off.

Results

Breakfast Pizza – Why Not?

This was a tasty little idea from Sandra Lee over at the food network. It’s a great solution if you’ve mixed up a bit more dough than your dinner guests could handle – instead of making a bunch of instantly left-over piza, how about saving that last dough ball and making breakfast pizza?? I like it!

Ingredients

  • 4 eggs, lightly beaten
  • 2 tablespoons butter
  • 2 (8-inch) pizza crusts (recommended: Boboli)
  • 1 tablespoon extra-virgin olive oil
  • 2 cups shredded jack cheese blend (recommended: Colby)
  • 4 fully cooked sausage patties, crumbled (recommended: Jimmy Dean)
  • 1/4 cup shredded Parmesan
  • 1 medium tomato, diced
  • 1 teaspoon Italian seasoning

Directions

Set up grill for direct cooking over medium heat. Oil grate when ready to start cooking.

In a medium pan over medium heat, scramble eggs in butter; set aside.

Lay out pizza crusts and brush each with oil. Top with eggs, cheese, crumbled sausage, Parmesan, tomatoes, and Italian seasoning.

Slide onto hot oiled grill and cook, covered, 8 to 10 minutes or until cheese has melted and begins to bubble.

Serve hot, cut into wedges.

INDOOR: Preheat oven to 450 degrees F. Prepare pizza as directed. Bake in preheated oven for 8 to 10 minutes or until cheese is melted and begins to bubble.

The original posting of this recipe can be found here.

Yeast-Free Pizza Dough – The Photographic Results

After trying the recipe in my original post on Yeast-Free Pizza Dough, I have some results to report. The dough itself was much more solid feeling than a regular pizza dough – I began in the same fashion I would normally flatten dough out, on the counter with my hands, but after a certain point, it began to feel like I was trying to toss a big sheet of cookie dough, not piza dough. So I got out my trusty rolling pin and went to town – this easily created a very thin, very pliable dough that I could then load onto my pizza pan and prep for the oven. When the pizza came out, it looked as if it had not risen at all – I suspect that my long rest in the fridge negated any effect the baking powder had, and the double acting feature was all but absent. The dough baked very thin, but because of the high oil content, it was very crispy – it began to taste like a homemade cracker after a few bites. There was good snap, it supported the weight of the toppings, it had a real buttery flavor ( even though there was no actual butter in the dough) – all in all, it wasn’t bad.

However, coming from the yeast world and knowing what I was missing, it wasn’t great either. I think it was just a preference thing. I felt it was a bit dry and a bit dense. I can actually get my yeast dough just as thin, but the yeast dough feels much lighter and airier in your hand and in your mouth. Also, as you eat the yeast-free slices, they feel heavy in your stomach – the yeast slices feel like you could go on eating forever! My dad tried a slice and actually liked the yeast-free pizza a lot, but I think for my money, if I had the option, I would stick with a yeast leavened dough. Now please enjoy some photographic samples of a yeast-free pizza.

This slideshow requires JavaScript.

Yeast-Free Pizza Dough – Pizza for Restricted Diets

I’ve recently found it necessary to explore yeast-free pizza dough and so I’d like to offer this recipe up as a jumping off point for those celiac disease or are taking Isoniazid. I would suggest using double-acting baking powder as all the chemical leavening may just leave this dough is you let it rest for any amount of time. If you use double-acting baking powder, you’ll get an initial boost of CO2 when the powder is first incorporated into the dough, but you’ll also get a second burst of gas when you apply the heat a couple days later.

  • 2 c. bread flour
  • 1 tsp. salt
  • 2 tsp. baking powder
  • 2/3 c. water
  • 1/4 c. vegetable oil

Mix all of the ingredients together in a bowl or your stand mixer. Mix until everything has come together and looks like a rough dough. Then stop, cover the bowl with some plastic, and let sit for 20 minutes. After 20 minutes, start that stand mixer a-mixin again and mix for 5-8 minutes. Then, you guessed it, stop the mixer and re-cover it – let it rest for another 20 minutes. Lastly, place the dough in the fridge and let sit for a day or so – pull it out an hour before baking and let the dough return to room temp. Make a pizza and place it in a 550+ oven for a short amount of time.

The only thing I’m unsure about here is the rest in the fridge. Normally this would give the yeast time to develop flavor and begin to convert the dough into yeast by-product (CO2) but in this case that won’t be happening. My theory is that a day-long rest in the fridge might still be nice for the overall texture of your dough, and if it went into the fridge as a tight, tough ball of dough, the rest should give the gluten network that has formed time to relax and slacken so you can spread/toss your dough more easily. I’ll report on my findings here.

Good luck – and good eats!

-Ryan

I found the proportions for the ingredients listed in this recipe here. Thanks!

Tonight’s Pizza Margherita

The Number One (#1) Secret Ingredient in Pizza Dough – You May Not Like The Answer

For a long time, I was an impatient pizza chef. After all, a recipe that required almost a week to prepare sounded ludicrous! Who could plan their eating habits that far in advance, I wondered? Well my friends, you and I have to become those exact people if we are ever to reach our lofty pizzaiolo goals. Time, after all, is the number one secret ingredient in pizza dough.

There is no one bigger ingredient in a dough recipe that will affect the flavor and depth of your dough. Brand of flour, oil or no, salt or no… all of these options are minuscule compared to the choice you make when you prepare a dough half  an hour before you bake it.

I have found this one rule to be true for almost all home pizza making: If the recipe calls for two hours of rise time in between mixing and baking, place your dough in a covered bowl, place the bowl in the fridge, and leave it there for three to five days. If the recipe calls for twelve hours of rise time, place your dough in a covered bowl, place the bowl in the fridge, and leave it there for three to five days. A long, slow, cold rise time will do wonderful things to your dough. In fact, about a day or so into the rise, pull the dough and and punch it down – then place it back in the fridge of course. This will further develop the flavor and texture (not to mention redistribute the bubbles which have formed in your dough).

So there you have it. I know, it’s kind of a bummer. As you read this article, the spark went off in your head “How about pizza tonight!” But what you need to retrain yourself to think is this, “How about pizza five days from now??”

It’s time to start paying attention to time, the secret ingredient in all pizza dough.